Bathroom Waterproofing System: Membranes, Details, Testing
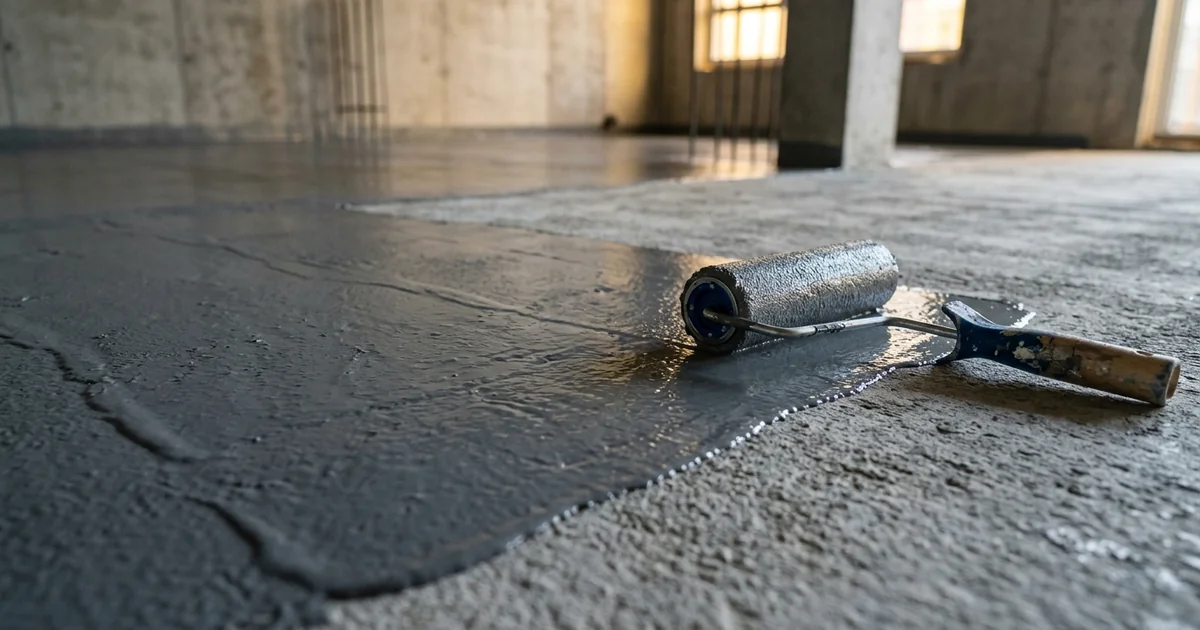
A shower floor can receive far more water in a year than rain puts on a roof, yet it often depends on tile and grout to hold that water back. The leak surfaces months later as a stained ceiling below, mould behind a wall or tiles that sound hollow, and the repair means lifting the floor. This guide explains the bathroom waterproofing system, from why tile leaks to membrane classes, standards, junction details, terrace design and flood testing. It draws on EN 14891, industry literature on ANSI A118.10, ASTM D5957 flood-test guidance and the Indian standard IS 3067. It also reflects the formulation support Global Formulation gives construction chemical makers.
Bathroom Waterproofing System Basics: Why Tile and Grout Are Not Waterproof
Ceramic tiling looks sealed, but it is not waterproof. A technical paper from Custom Building Products explains that cement-based grout contains micro-capillaries that let water through, and that penetrating sealers on the joints do not stop intrusion completely. The tile itself can be porous enough to pass water, and grout can separate from the tile edge as the substrate moves. Water that passes the surface reaches the wall cavity or floor structure, where it causes damage and invites mould.
| Layer | Role in the Assembly | Waterproof? |
|---|---|---|
| Tile | Wearing surface | No; the tile body can be porous |
| Cement grout | Fills the joints between tiles | No; micro-capillaries pass water, and joints can separate from the tile edge |
| Bonding mortar | Fixes the tile and carries water that gets through to the membrane | No |
| Membrane | Continuous waterproof layer, placed just below the bonding mortar | Yes, when it is continuous and sound |
| Substrate and screed | Supports the assembly and provides the fall to the drain | No, but it must be sound and sloped correctly |
The paper recommends placing the membrane just below the tile bonding mortar, as close to the tile as possible. That position limits the water held in the assembly and stops moisture from reaching the substrate. It also notes that the International Building Code says little about waterproofing shower walls and surrounding areas, which is why the US tile industry set its own recommendations. Our guide to tile adhesive classification under EN 12004 and ANSI A118 covers the bonding mortar that sits above the membrane.
With the position settled, the next choice is which membrane chemistry and format suits the job.
Wet Area Waterproofing Membrane Types: Liquid-Applied and Sheet Systems
Two families of membrane serve tiled wet areas. Liquid-applied products cure into a film, and prefabricated sheets are bonded in place. EN 14891:2017 defines liquid-applied products in three classes by chemistry. The choice between classes depends on site conditions, curing needs and the movement the surface will see.
| Type | Chemistry and Form | Practical Notes |
|---|---|---|
| CM, polymer-modified cementitious | Hydraulic binders, aggregates and organic additives, mixed with water or liquid admixture just before use | A cementitious membrane needs full curing before flood testing |
| DM, dispersion | Ready-for-use aqueous polymer dispersion with organic additives and mineral fillers | Each coat is inspected for voids and pinholes before the next goes on |
| RM, reaction resin | One- or multi-component synthetic resin with mineral fillers that hardens by chemical reaction | Component handling and reaction time follow the maker's instructions |
| Prefabricated sheet | Plastic or elastomeric sheets bonded to the substrate, some with pressure-sensitive backing | Seams, corners and penetrations must be sealed; some types need a primer |
The Custom Building Products paper compares the two formats from a liquid-membrane maker's viewpoint, so treat its cost comparison as one view. It says a liquid membrane needs no primer, has no seams and makes transitions continuous, and that a second coat is applied to assure a continuous film with no voids. It notes that sheets, by contrast, must be pieced together and every seam, corner and penetration sealed. Sheets bonded with thin-set mortar should stay undisturbed for about 24 hours so the bond can cure.
The standards behind these classes define what waterproof is allowed to mean.
Waterproofing Standards for Tiled Wet Areas: EN 14891 and ANSI A118.10
Two standards dominate wet-area membranes: EN 14891 in Europe and ANSI A118.10 in the TCNA Handbook details. Both test the membrane as a product, not the room as a system. EN 14891:2017 applies to liquid-applied products based on polymer-modified cementitious mortars, dispersions and reaction resins used beneath ceramic tiling. Its scope names external tile installations on walls and floors and in swimming pools.
| EN 14891:2017 Characteristic | Requirement | Status |
|---|---|---|
| Initial tensile adhesion strength | At least 0.5 N/mm2 | Basic, all classes |
| Tensile adhesion after water contact, heat ageing, freeze-thaw cycles and lime water | At least 0.5 N/mm2 in each case | Basic, all classes |
| Waterproofing | No penetration and no more than 20 g weight gain | Basic, all classes |
| Crack bridging under standard conditions | At least 0.75 mm | Basic, all classes |
| Tensile adhesion after contact with chlorinated water (P) | At least 0.5 N/mm2 | Optional |
| Crack bridging at minus 5 °C (O1) and minus 20 °C (O2) | At least 0.75 mm | Optional |
ANSI A118.10 states the requirements for a load-bearing, bonded, waterproofing membrane for thin-set tile and dimension stone installation, and it applies to trowel-applied liquid and sheet membranes. The Custom Building Products paper says membranes used in TCNA Handbook details must meet it. It adds that the standard assures a waterproof membrane that is strong enough to last the life of the assembly. The same paper notes that the TCNA Handbook requires a vapour permeance below 0.5 perms under ASTM E96 for continuous-use steam showers.
Detailing is where a continuous membrane most often stops being continuous.
Floor-to-Wall Junctions, Drains and Penetrations: Where Continuity Is Won or Lost
A membrane is only as watertight as its weakest transition. The Custom Building Products paper warns that water can get through the smallest opening, so seams, corners, drains and pipe penetrations decide the result. Liquid membranes make transitions continuous, while sheets need every seam and corner sealed. The practices below come from tile-industry guidance and from IS 3067, the Indian code for design details and preparatory work.
| Detail | Practice | Source |
|---|---|---|
| Fall to the drain | Pitch floors to the drain at the recommended fall of about 2 percent; standing water can lead to premature failure | Custom Building Products |
| Changes of plane and gaps | Embed reinforcing mesh or tape in the membrane at changes of plane and across gaps | Custom Building Products |
| Drains | Tie the membrane into the drain, clamped as a pan liner, bonded to the lower flange, or used with a drain that has an integral bonding flange; keep liquid membrane out of weep holes | Custom Building Products (TCNA details) |
| Pipes through a roof or terrace slab | Build a concrete angle fillet around the pipe and take the treatment over it | IS 3067 |
| Slab and parapet junction | Build a fillet of 75 mm radius; tuck the treatment into a groove at least 150 mm above the roof level, or carry it over a low parapet | IS 3067 |
| Movement joints | Treat expansion joints with non-absorbent, compressible, non-brittle, watertight sealant | IS 3067 |
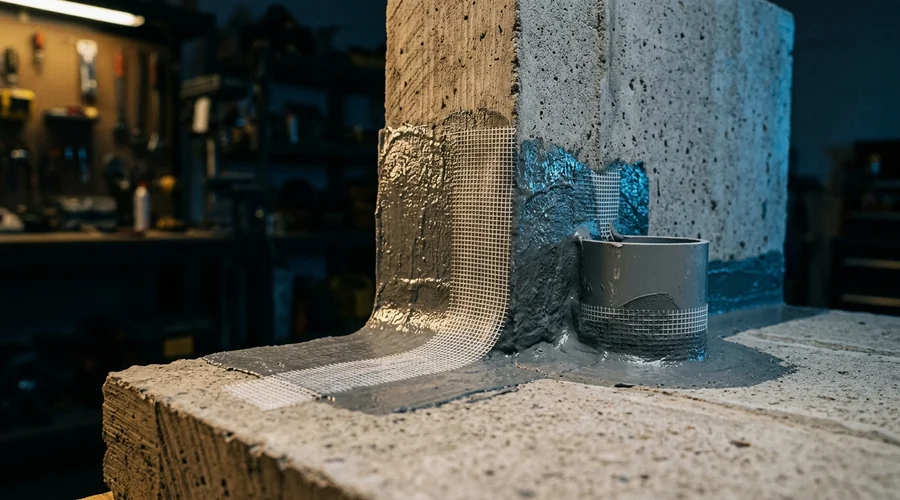
The drain examples carry a design lesson. The paper describes three options. One clamps the membrane into a traditional drain under the mortar bed. Another applies the membrane over the bed and diverts it to the lower flange. A third uses a drain with an integrated bonding flange that sends all water straight down. Each option changes how much of the tile assembly is saturated and so how much moisture can evaporate into the room. Our guide to cementitious versus epoxy tile grout covers the joint material above the membrane.
Open terraces and balconies add weather to these problems, so they need their own design logic.
Balcony Waterproofing Detail and Terrace Design: Drainage, Falls and Movement
Open terraces and balconies add rain, sun and temperature swings to the bathroom's problems. IS 3067 asks the designer to consider the roof shape and type, the finish, thermal insulation, projections, the drainage arrangement, rainfall intensity and the total weight of the waterproofing treatment. The code also treats surface preparation as part of the design. EN 14891's optional low-temperature crack bridging classes exist for service conditions that need enhanced performance.
| Item | What IS 3067 Says |
|---|---|
| Cracks | Well-defined cracks other than hair cracks are cut open, cleaned and filled flush with cement-sand slurry or a cold-applied bituminous caulking compound |
| Surface | Regrade and cure before treatment; clean the roof, parapet and drain areas of fungus, moss and dust by wire brushing and dusting |
| Drains | Provide adequate openings in number and size, per Table 3 of IS 2527; place outlets to prevent local accumulation of water |
| Drain mouths | Widen and round masonry drain mouths with cement mortar; cut a groove round cast iron outlets to tuck the treatment |
| Parapets | Groove at least 150 mm above roof level for parapets over 450 mm high; carry the treatment over low parapets |
| Joints | Seal expansion joints so that they do not impair the waterproofing treatment |
IS 3067 belongs to a series. Its foreword lists companion codes for bitumen felts, bitumen mastic, lime concrete and other treatments, and calls itself an essential adjunct to them. Our guides to bituminous waterproofing membranes and polymer-modified cementitious waterproofing cover two of the treatments that follow this preparation.
Whatever the design, the finished membrane still has to be proven, which is the job of the flood test.
Flood Testing a Waterproofing Membrane: Procedure and Acceptance
A flood test is the only direct proof that a finished membrane holds water. LATICRETE's technical data sheet on flood testing draws on ASTM D5957 for horizontal waterproofing and calls the practice critical for showers and other areas of significant water flow. It says the step is often skipped under time pressure, performed improperly or misread. Done correctly, it gives a measure of confidence that the system performs as intended.
| Step | What to Do |
|---|---|
| Prepare | Cure the membrane for the time the manufacturer specifies; inspect it for voids and pinholes and repair them |
| Contain | Plug all drains with approved test plugs; fill around the drain first to check it; use removable containment that does not penetrate the system |
| Check the structure | Confirm the structure can carry the weight of the water, with deflection limits maintained |
| Flood | Use potable water to a depth between 25 and 100 mm at the low point, with a mean depth no greater than 65 mm, introduced gently |
| Control | Place a flat-bottomed pan of water at similar depth nearby, and compare water loss in the two |
| Hold | Maintain the test for 24 to 72 hours with continuous monitoring and no added water |
| Inspect | Check the spaces below at 1 to 2 hour intervals; if water leaks, drain it, find the source, repair and retest |
| Accept | No leaks detected and the membrane, including flashing, remains intact |
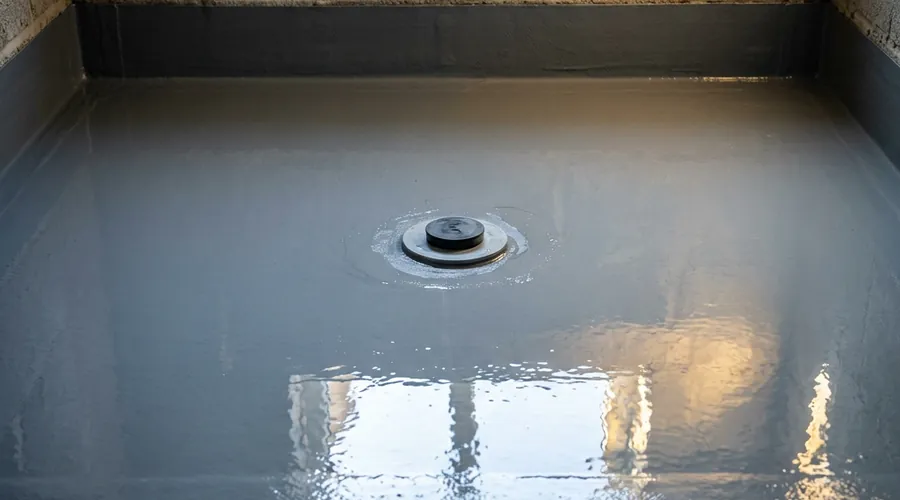
The data sheet is explicit about timing. Flood testing should happen before any material goes over the membrane. The membrane must also have cured for the time the manufacturer specifies, which depends on the product and on conditions. If water loss in the test area is significantly greater than in the control pan, the data sheet says membrane leakage is likely. Any water added after the test starts invalidates the result.
Building these steps into a product's technical file is where a formulation partner helps.
Working With a Construction Chemicals Formulation Consultant
Wet-area membranes sit between polymer chemistry, cement chemistry, tile-fixing practice and standards testing. A construction chemicals formulation consultant formulates the membrane for the class and standards it must meet, then designs the test programme. Construction chemical product development services extend that work to detailing accessories, technical data and installer guidance. A contract formulation scale-up partner then carries the validated recipe into batches with controls on the polymer, filler and binder inputs.
- Choose the class and target standards — CM, DM or RM, with the EN 14891 optional classes and ANSI A118.10 in view.
- Formulate the membrane — binder, polymer, fillers and additives for the chosen class.
- Test the basic characteristics — tensile adhesion after conditioning, waterproofing and crack bridging.
- Check tile-system compatibility — primers, adhesives, grout, reinforcing tape and drain fittings.
- Define the application — brush, roller, trowel or spray, coat build and cure before flood testing.
- Write the detailing guide — junctions, drains, penetrations and movement joints.
- Set the QA protocol — flood test procedure and acceptance criteria for the installer.
- Scale up — batch controls and release tests for the plant.
Our construction chemicals range shows where waterproofing sits among admixtures, adhesives and repair systems. The construction chemicals technology and formulations guide covers the wider chemistry. Entrepreneurs planning production will find the practical route in our guide to starting a waterproofing chemical manufacturing business. Global Formulation provides membrane formulation, test planning, detailing systems and scale-up support for construction chemical manufacturers. Mix proportions, polymer loadings and coverage rates stay outside this guide by design.
Frequently Asked Questions
What is a bathroom waterproofing system?
A bathroom waterproofing system is a continuous waterproof layer, usually a liquid-applied or sheet membrane, placed beneath the tile bonding mortar. It is combined with falls to the drain, sealed junctions, drain connections and a flood test.
Custom Building Products' technical paper stresses that the membrane should sit just below the bonding mortar, as close to the tile as possible. That keeps water out of the substrate and limits the water held in the assembly.
The system is the membrane plus the details and the proof of watertightness, not the membrane alone.
Why can't tile and grout waterproof a shower?
Ceramic tiling is not waterproof. Cement-based grout contains micro-capillaries that let water through, and treating the joints with penetrating sealers does not eliminate water intrusion completely.
The tile itself can be porous enough to pass water, and grout can separate from the tile edge as the substrate moves.
A membrane under the bonding mortar is therefore needed to make the assembly waterproof.
What types of liquid waterproofing membrane exist for tiling?
EN 14891 defines three classes. CM products are polymer-modified cementitious mixtures of hydraulic binders, aggregates and organic additives that are mixed with water on site. DM products are ready-to-use aqueous polymer dispersions with mineral fillers. RM products are reaction resin systems that harden by chemical reaction.
Sheet membranes are the alternative to liquids. They need seams, corners and penetrations to be sealed carefully, and some need a primer.
Liquid membranes give a continuous film with no seams, and a second coat is used to close any voids.
What does EN 14891 require of a liquid-applied waterproofing product?
EN 14891:2017 sets basic requirements for all three classes. Tensile adhesion strength must be at least 0.5 N/mm2 initially and after water contact, heat ageing, freeze-thaw cycles and contact with lime water. The waterproofing test requires no penetration and no more than 20 g weight gain, and crack bridging under standard conditions must be at least 0.75 mm.
Optional characteristics cover contact with chlorinated water (P) and crack bridging at minus 5 degrees Celsius (O1) and minus 20 degrees Celsius (O2).
The standard tests the product and gives no recommendations for the design and installation of the tiling system.
What is ANSI A118.10 and why does it matter?
ANSI A118.10 states the requirements for a load-bearing, bonded waterproofing membrane for thin-set tile and dimension stone installation. It applies to trowel-applied liquid and sheet membranes.
Waterproof membranes used in details of the TCNA Handbook must meet it. Custom Building Products notes that it assures the membrane is waterproof and has the strength to last for the life of the tile assembly.
A product that meets it can be specified in the standard tile assembly details.
How do you flood test a waterproofing membrane?
ASTM D5957 covers flood testing of horizontal waterproofing. Following it, inspect the cured membrane for voids and pinholes, then plug the drains and check the drain area first. Next, flood with potable water to a depth between 25 and 100 mm at the low point.
Keep the water in place for 24 to 72 hours, compare the level with a control pan that shows evaporation, and inspect the spaces below every one to two hours. Any water added after the test starts invalidates it.
If a leak appears, drain the area, repair it to the manufacturer's instructions and run a new test. Do the test before any tile or other material goes over the membrane.
What are the key details for balcony and terrace waterproofing?
IS 3067 asks the designer to consider roof shape, finish, thermal insulation, projections, drainage, rainfall intensity and the weight of the treatment. Drain openings must be adequate in number and size, and expansion joints need compressible, non-brittle, watertight sealant.
At parapets the treatment is tucked into a groove at least 150 mm above roof level. On a low parapet it is carried over the top, with a fillet at the junction. Pipes through the slab get a concrete angle fillet and the treatment is taken over it.
Surface preparation matters as much: cut and fill well-defined cracks, regrade and cure, and clean the surface before treatment.
Developing a Wet-Area Waterproofing Product?
Global Formulation supports membrane formulation, EN 14891 and A118.10 test planning, detailing systems, flood-test protocols and scale-up to a qualified plant.
Talk to Our Formulation Team